Essential Lessons for 2D Platformer Level Design
Top 3 lessons I learned as a beginner game dev

I've finished GamedevTV's 2D Platformer tutorial found on Udemy and here are the top 3 lessons I learned when creating the levels. The main lesson is spending more time up front in terms of the story and elements of your game. This will help save time when working on any of the levels in your game.
Start small and choose a tileset with a handful of tiles
I'm new to game development and the tileset I chose was Szadi Art's Pixel Platformer Castle (shoutout to Szadi Art for letting me use their tileset). However this tileset was overwhelming for a beginner like me. The tutorial used only about 30 tiles for their platform. Compared to the Pixel Platformer Castle which has over 100 tiles! This was intense and made it very hard to get a cohesive and pretty platform.
Udemy tutorial tiles:

Pixel Platformer Castle tiles:

The Pixel Platformer Castle tiles ran into issues where the standard horizontal platform did not connect properly with the staircase. After trial and error I found the correct tile which connected with the staircase:


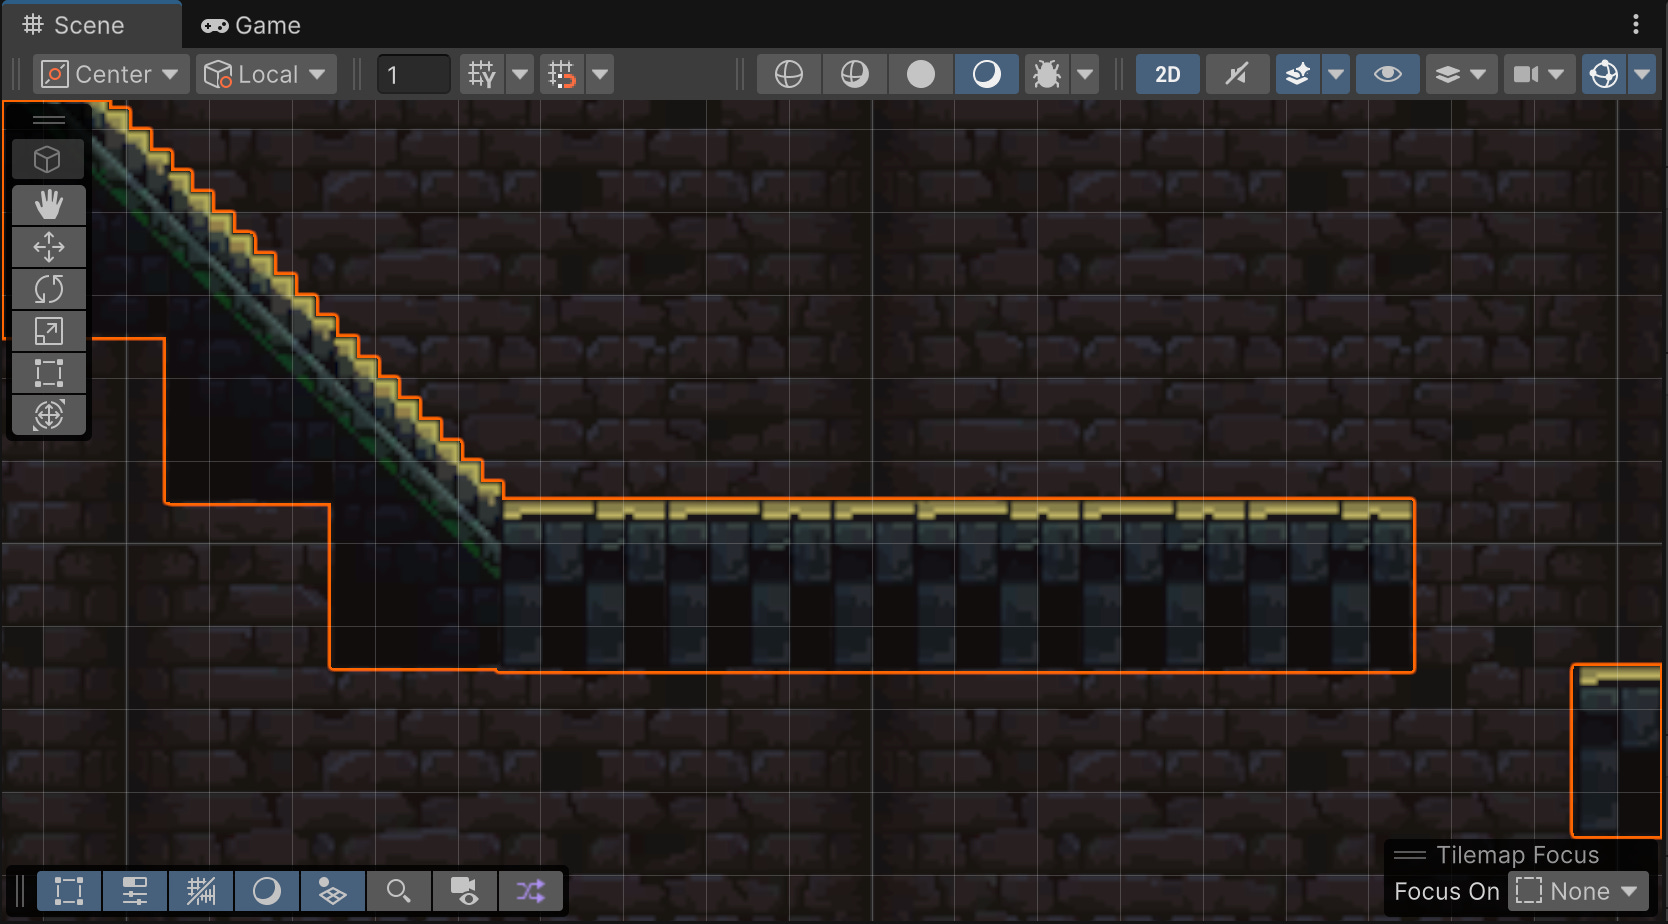
Huzzah!
Another mistake I made would be to ensure you're aware of the pixels per unit for the tileset. I used two different tilesets and they had different pixels per unit. Pixels per unit is the measurement system that is used for 1 square block in unity. See screenshot below where the corner of my level has one tile for the border of the level.

When downloading assets make sure you know what is the size of the assets that were used, was it 32x32 or 16x16? This helps when drawing out the level you want to create. Within Unity's Inspector when selecting a tileset you can change the pixel per unit based on what the size of the assets are. In the example below the assets for the Pixel Platformer Castle tiles have a size of 16x16.

Use Sorting Layers when adding depth to a background
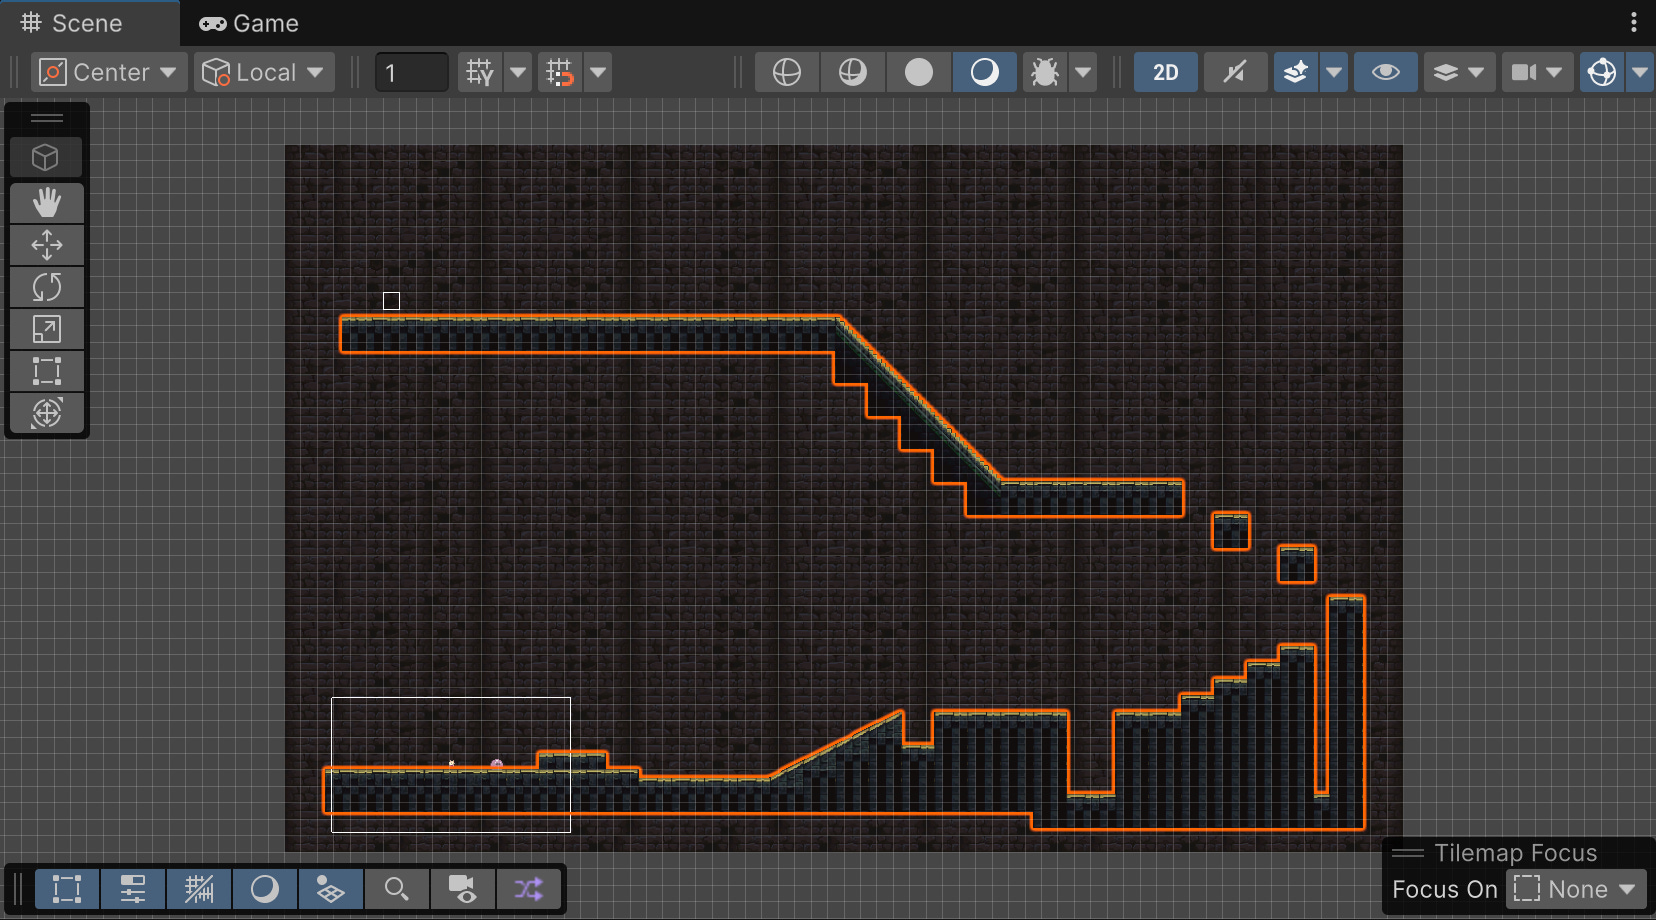
After creating the overall layout of the platform that the player should run on, I wanted to add some visual depth to the game. See my boring level below without any additional depth.
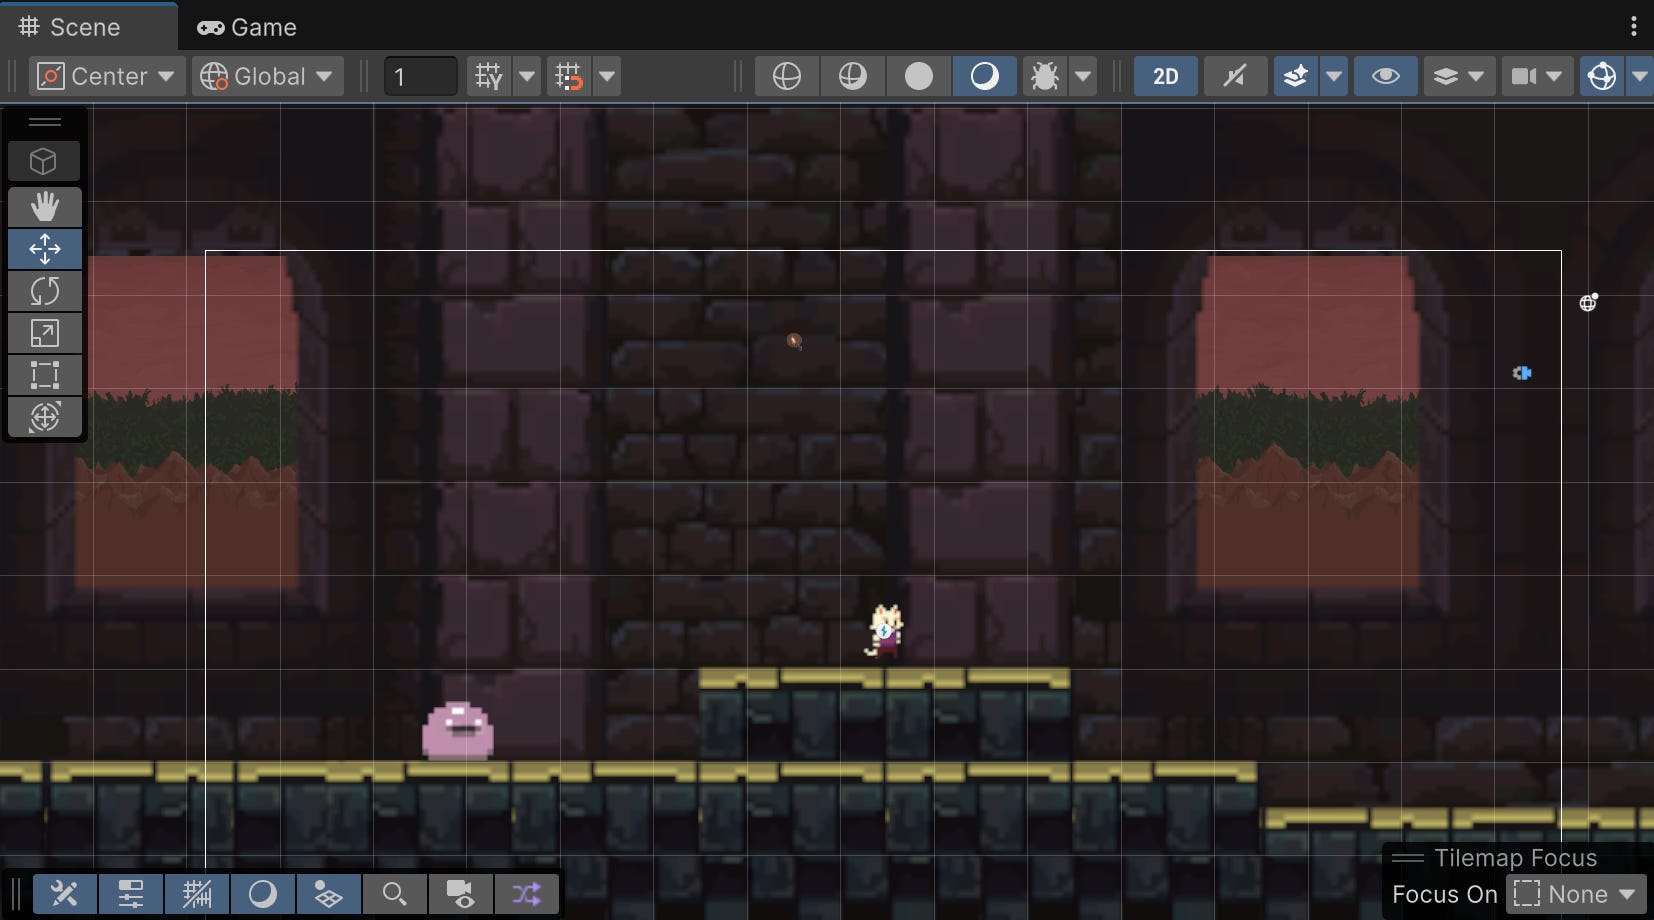
I wanted to create a sense of immersion. I chose the Platformer Castle tileset so I should try and use some of the spice that came with the tileset. I decided to add a window and a mountain scape. Boy oh boy did this take longer than expected. The major learning here is the order that you start placing a background matters. Which seems simple enough but it didn't cross my mind when I started to create this mountain scape. I was also using Unity's Layer system and Sorting Layers and this just added to my confusion. I ended up creating specific tilemaps and sorting layers for each tilemap to have more control over the order of the layers. In essence I had a background layer for the plain castle rock background, then I had a background structures tilemap for the windows and pillars within the castle. Then I had to add two more layers for the external environment and the salmon colored sky outside the window and a layer for the mountains and the grass labeled "Morebackground" in the screenshot below.

Using multiple tilemaps and sorting those tilemaps to a particular order ultimately helped create the castle and mountain scape feel.
Designing a level needs effort, time, and care
Like baking a cake you need a recipe, patience, and maybe a bit of love :)
When I started out creating the obstacles and enemies for this level I just wanted to use all of the things I learned from the Udemy tutorial. I wanted to use all the cool looking sprites to make my game feel fun. This isn't the best way to create a level or a game in my opinion. This method is useful to whip up something real quick for prototyping, but for creating a fully fleshed level that a player will enjoy, no way.
Level design requires more than just throwing all the free assets you've obtained into a pot and hoping the game is fun and challenging. We need story and intention to help guide our level design. In my defense I am prioritizing learning Unity and game development topics so I didn't have time to create a story or an intended puzzle or obstacle that the player should solve.
I did research into level design and the game that came to was Celeste. In Celeste player movement is perfected and the levels are designed to utilize the player's precise movement. I came across this GDC level design talk with one of the developer of Celeste Maddy Thorson and they go into how the devs were working on balancing freedom and a determined route to completing the level. The analogy which the devs used was like a mountain climbing gym where players had multiple paths to traverse a mountain. The devs of Celeste spent a ton of time reiterating on the narrative of each level, what is the pacing for certain plot points. Where do you feel a sense of safety, how do you teach a player through level design. All of these elements were considered when designing a level. There was lots of care and intention behind what the player was experiencing. Play testing is also mentioned in the GDC talk. And this is just as crucial as all of the elements mentioned. I do recommend watching that GDC talk if you need some insight into the process of making an amazing game. After trying to whip up a game without any recipe or reason why, I now know that every component needs a bit of effort and love when designing a level.
Looking back I would spend more time prepping and writing about a story for my game. I feel like if I had more story for this cat character/sprite I chose, then I would be inspired to create a world around the cat. Instead I chose a cute cat because I have a ugly cat, and I chose a castle background because why not. There were definitely cats during the medieval times right? Maybe that is the story I was looking for something like Puss in Boots. That is the main experience from going through this 2D platformer tutorial, don't rush so much to finish the tutorial, spend some time slowing down and creating the story and characters. Be more deliberate about the tilesets you chose and how you want to add depth to the background. The time you spend front-loading your design decisions will ultimately help you later down the line.
Here's a video of the level I made within Unity:
Adventure Cat 2D Platformer Tilemap - Watch Video